ksk: a most useful edging
A slipped 3-stitch edging to use again and again. And again.
(– – > straight to tutorial)
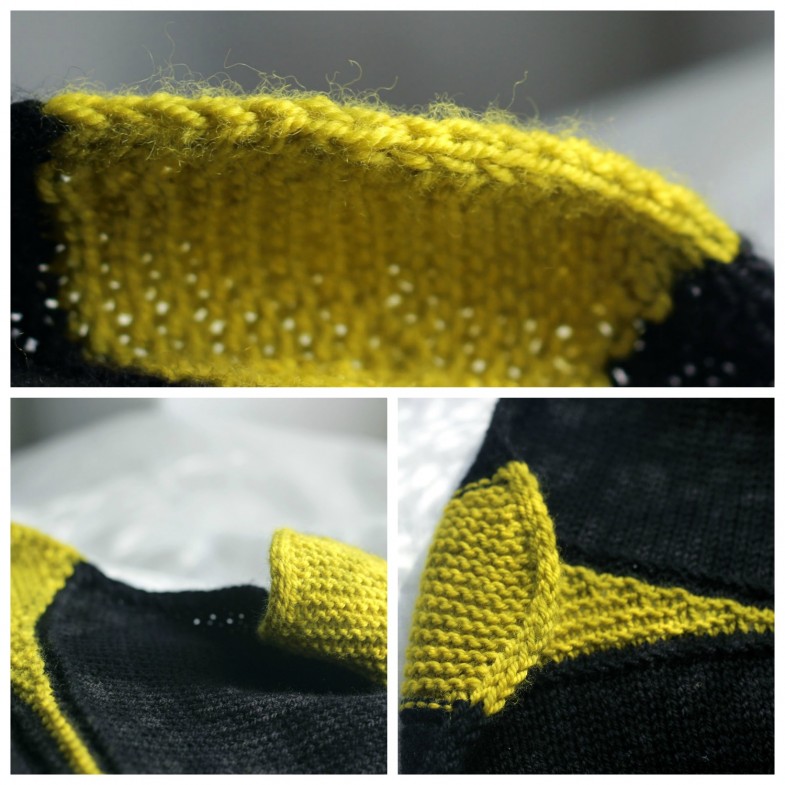
This simple edging is one I keep using for all sorts of designs and projects. Maybe you will too.
Just three stitches create a neat edge that looks properly finished.
A particular bonus: equally pleasing viewed from either side.
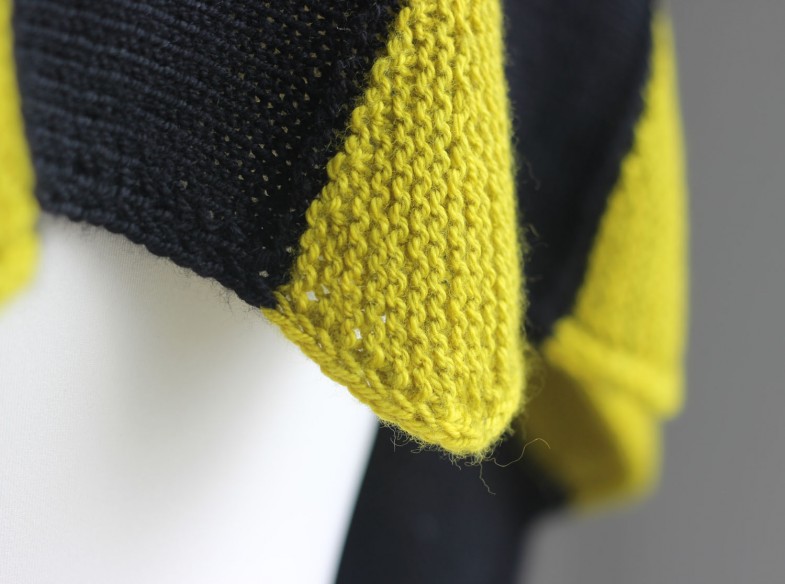
Here you can see how it curves nicely around the leaves on my Zenobia shawl (an old design I just re-knitted with Wollmeise Blend in order to update the instructions and pattern layout. Well, that and to get a soft squishy shawl in Blend).
How to knit the 3-stitch edging
Wrong Side sks = Sl1wyf, k1, sl1wyf
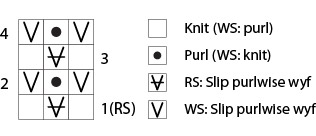
Right Side – ksk
Here, worked on the far (left) edge.

1. Knit to last 3 stitches.
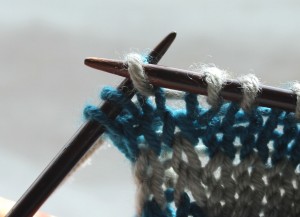
2. Knit 1.
(k1)
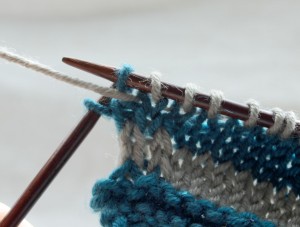
3. Take yarn to front, slip 1 purl-wise with yarn in front.
(sl1wyf)
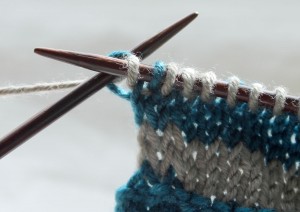
4. Take yarn to back, knit 1.
(k1)
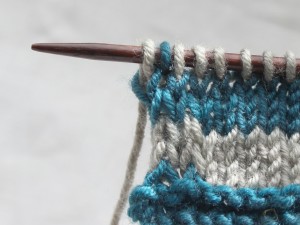
Right Side ksk is done.
If you look closely you can see how the slipped stitch column (under the blue stitch) retracts between the two knit stitches.
Wrong Side – sks
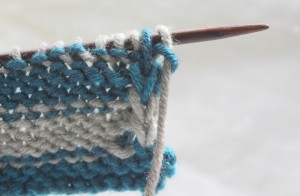
The view from the Wrong Side.
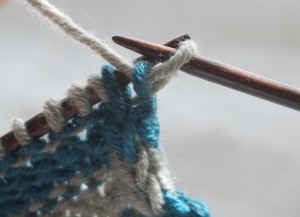
1. Take yarn to front, slip 1 purlwise (as if to purl) with yarn in front.
(sl1wyf)
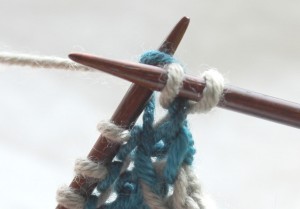
2. Take yarn to back, knit 1.
(k1)
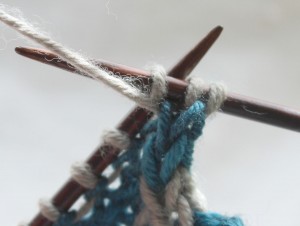
3. Take yarn to front, slip 1 purlwise
(sl1wyf)
That’s it!
In sum
On the Right Side: work the 3 first (and/or last) stitches as ksk.
On the Wrong Side: work the 3 first (and/or) last stitches as sks.
The edge looks identical on both sides because the outermost stitch rolls toward the Wrong Side.
Here are just three of my many projects that feature this edge.
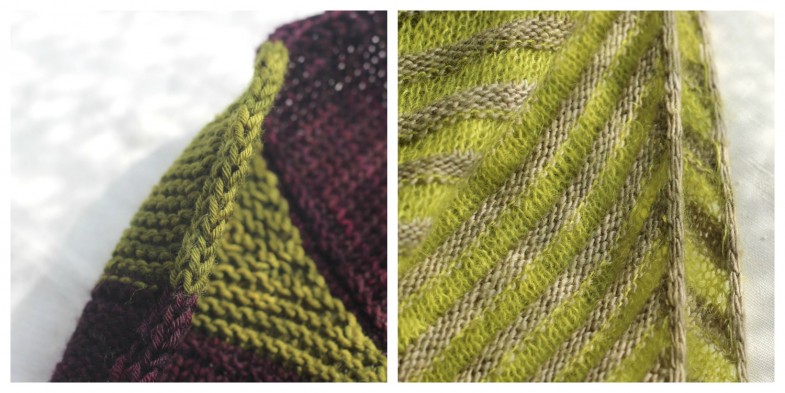
Zenobia & non troppo
You can find a list and explanations of most Abbreviations used in Åsa Tricosa patterns – some are linked to tutorials like this one.
Want to know what’s up my knitted sleeve? Sign up for the occasional Åsa Tricosa Newsletter.

13 Comments
I love it! Thanks for sharing this! 🙂
This looks very neat ~ thank you! Love learning new techniques 🙂
That looks great. I’ve always wanted a neat edge for Ysolda’s patterns with a built in button band and this seems just right.
I hope you’ve found your edge! 😉
(I have a favourite button band too. Look out for that in a future post.)
I love the KSK/SKS edge but want to stripe yarn for a few rows to create a fade between two colors. When should I add the new color? I’ve tried on the first stitch and waiting until the third stitch. I also use Stephen West’s technique for weaving in ends as you go. I get a little bar on the wrong side in the middle of the I cord, which I’d like to avoid. I appreciate suggestions.
Hello Sharran!
I switch colours inside the ksk edging.
That is, on a RS with the new colour, I first knit the ksk sts with the OLD colour, then switch to the new.
(If you are knitting stripes, the carried yarn is partially hidden in the join between edging and body.)
Åsa
Great way of doing the edges, beautyfull looks, thank you for sharing and help us, homeknitters, to nice garments.
Is it considered a stretchy bind off?
This is an edging that runs along the side(s) of your knitting – it provides a neat and well-defined side edge. You can find a stretchy bind off here.
Do you do the some edge stitches if you start your next color on the wrong side? I’ve been using your edging on a pattern I’m working on, but now that I’m knitting stripes my stitches in each color are not lining up as neatly as yours.
Hm, I’m not sure! On some striped shawls, I change make the colour colour change at the start of a new stripe on the RS after the ksk edging.
can this type of edging be used for flat knitting?
Yes, indeed. I use it in my (built-in) buttonbands. And as an alternative front edging on the Mayhem cardigan, and as an alterntiev to i-cord bind off for hems – and probably lots of other places, too. If you are asking whether the ksk-edging by itself will stop a straight edge of stocking stitch from rolling, it probably will not.