Nondaily Tip No. 10: simple pocket
How to add a simple (inline) pocket or two.
This is the most basic no-sew pocket, an inline pocket.
It works for both top down & bottom up garments.
It can be knitted with a contrast yarn. Or not – for more subtlety if subtlety is your thing.
1. Placement.
Knit to where you want your pocket opening.
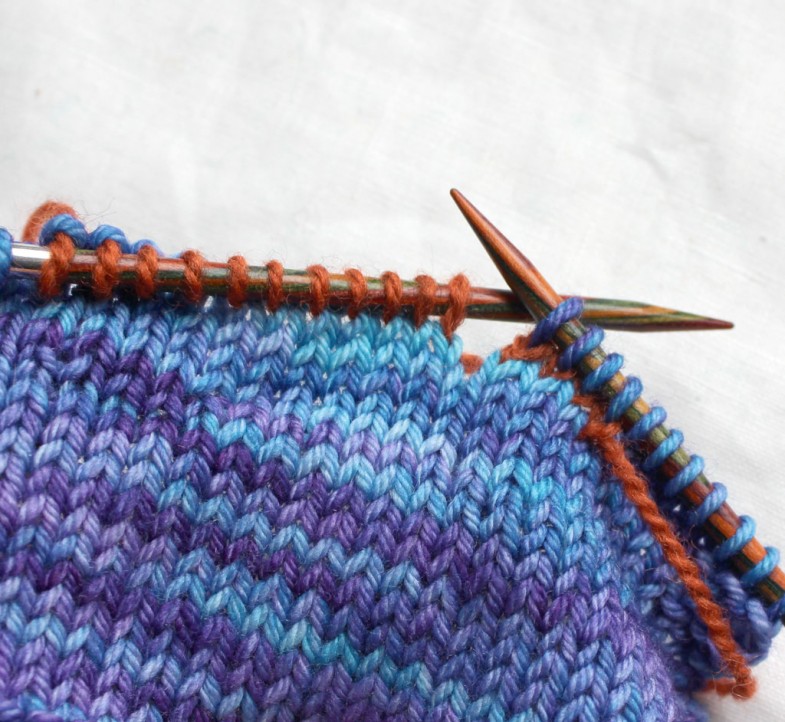
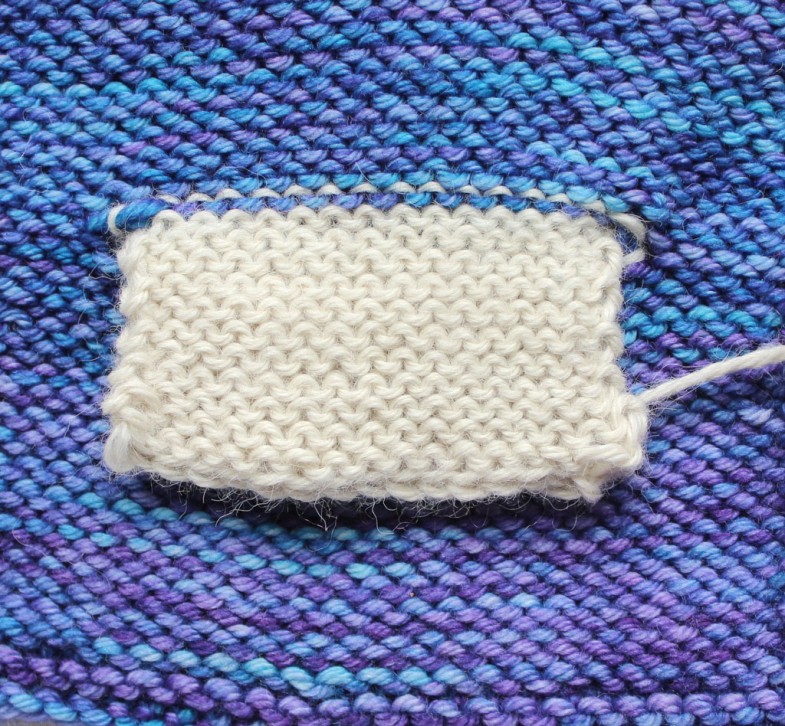
Knit x stitches with waste yarn – this is a place holder for your pocket.
(X is the width of your pocket – my pocket is 15 stitches wide.)
Slip these 15/x sts back to Left Needle.
2. Knit across these 15/x sts again, this time with your working yarn.
That’s it for now.
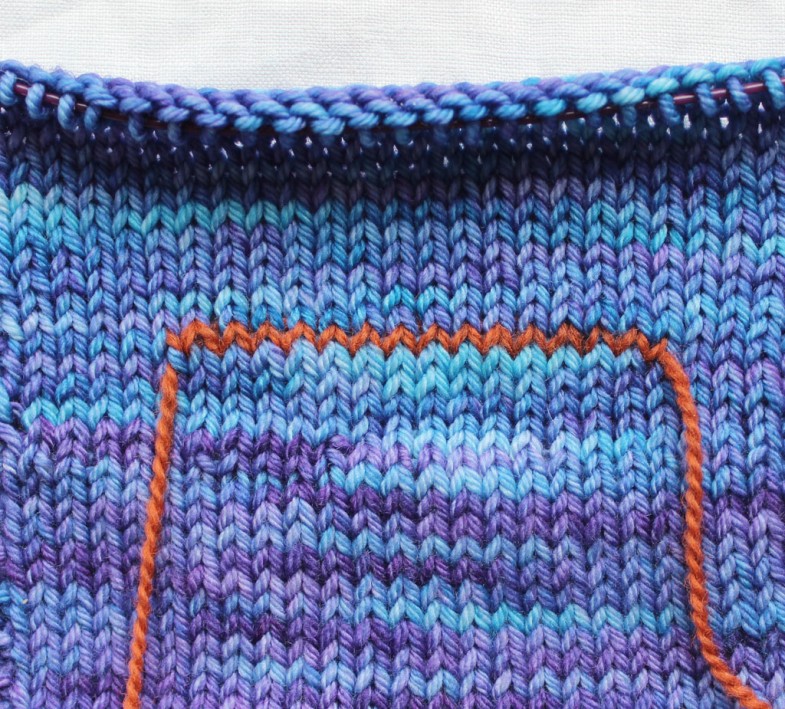 The placeholder waste yarn knitted into the fabric
2b. Just carry on knitting your pullover or cardigan as before.
And then… you can either knit the pocket when your sweater is all finished or after a few more rows, say 5–10 cm (2–4 in) of knitting.
3. Picking up the pocket stitches.
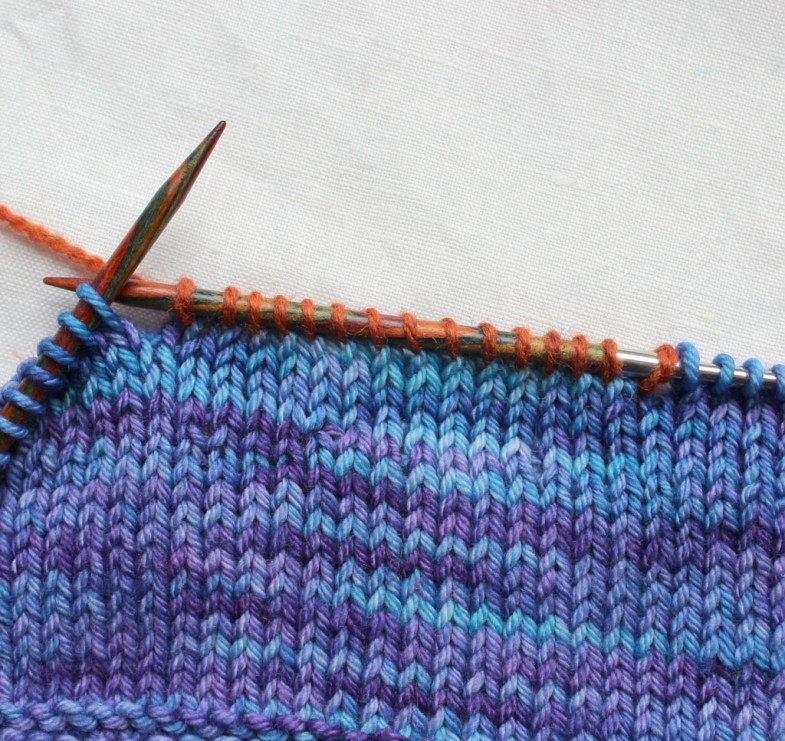
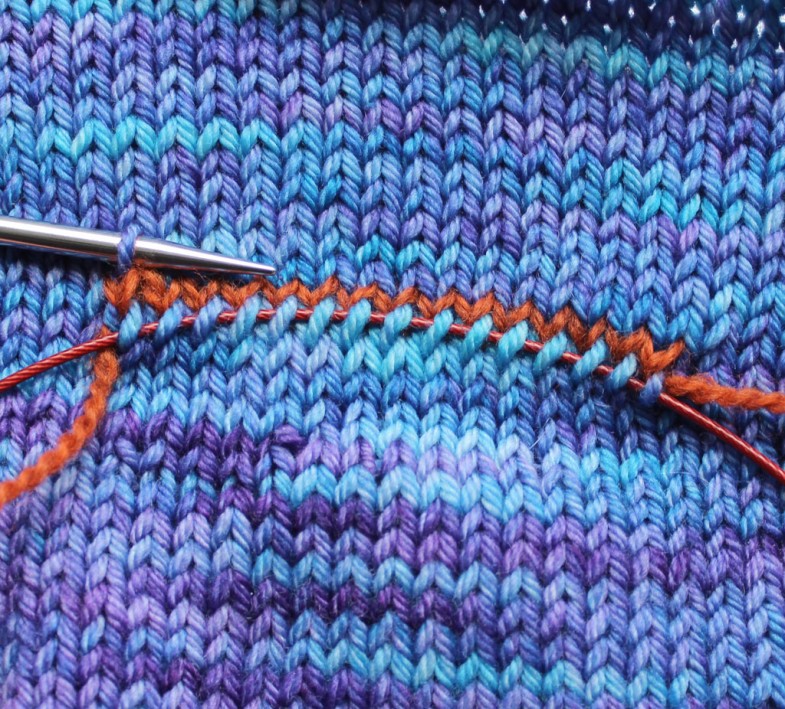
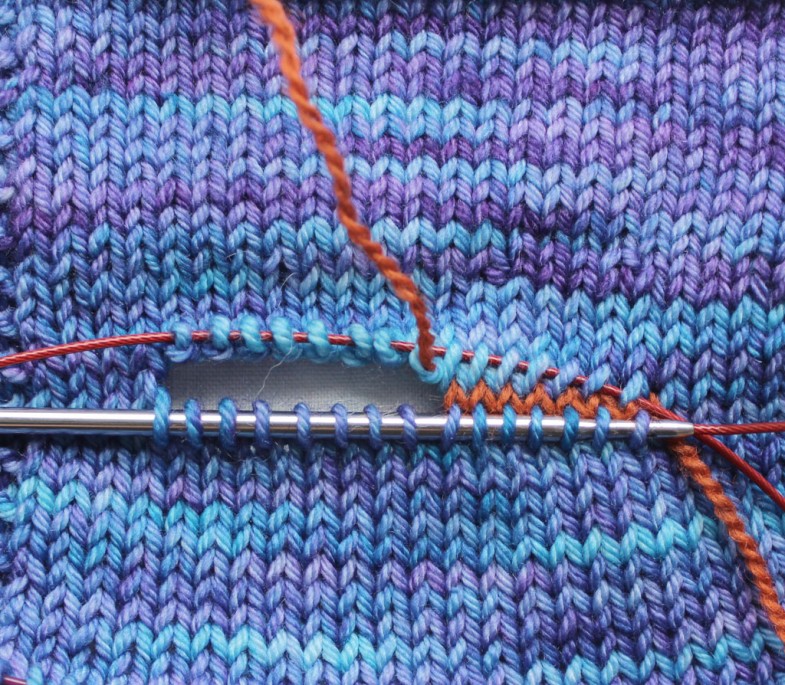
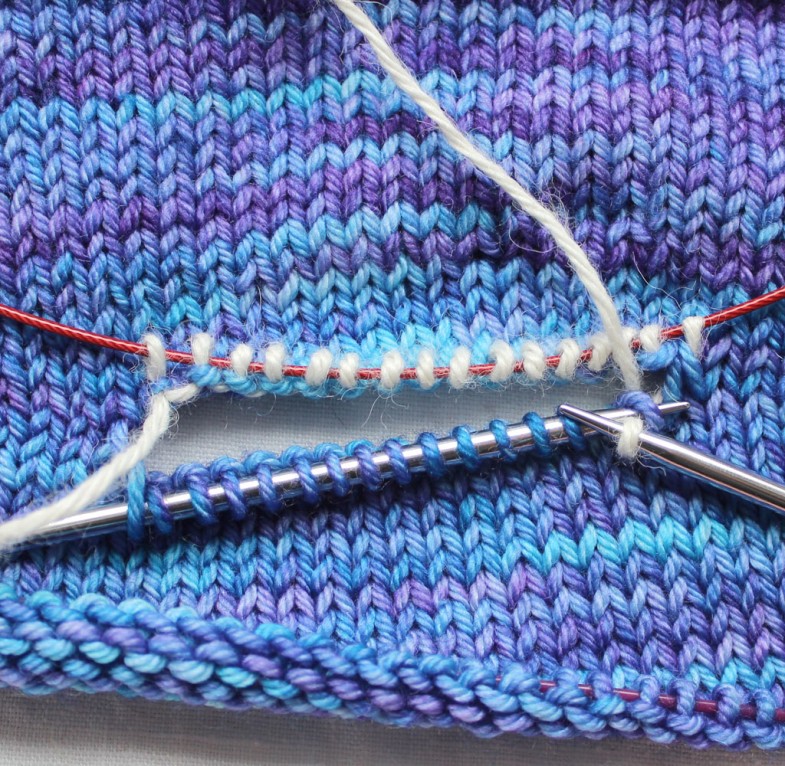
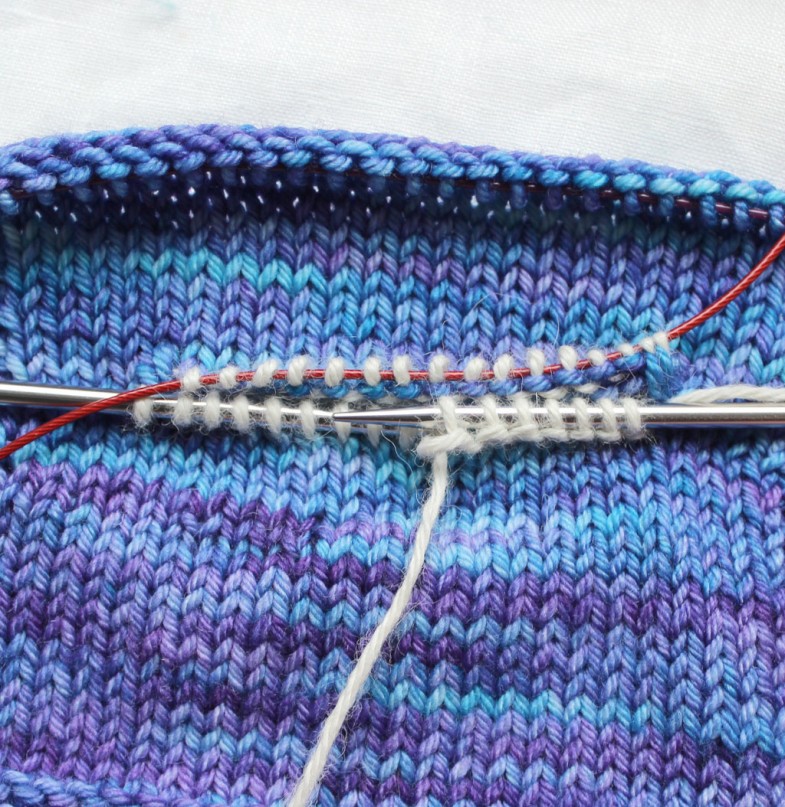
Thread a needle through each stitch below the waste yarn, picking up in the right leg of each ‚V‘.
(If magic looping, LOOP cable now).
Continue to thread needle through every stitch above the waste yarn.
Make sure you catch every stitch.
The sample pocket is worked on one long circular needle with the magic loop method.
Double pointed needles or two circulars would also work.
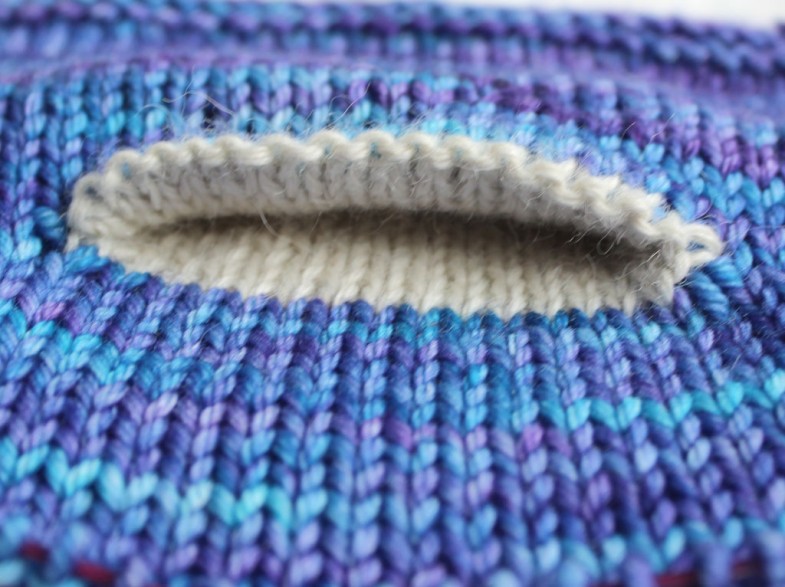
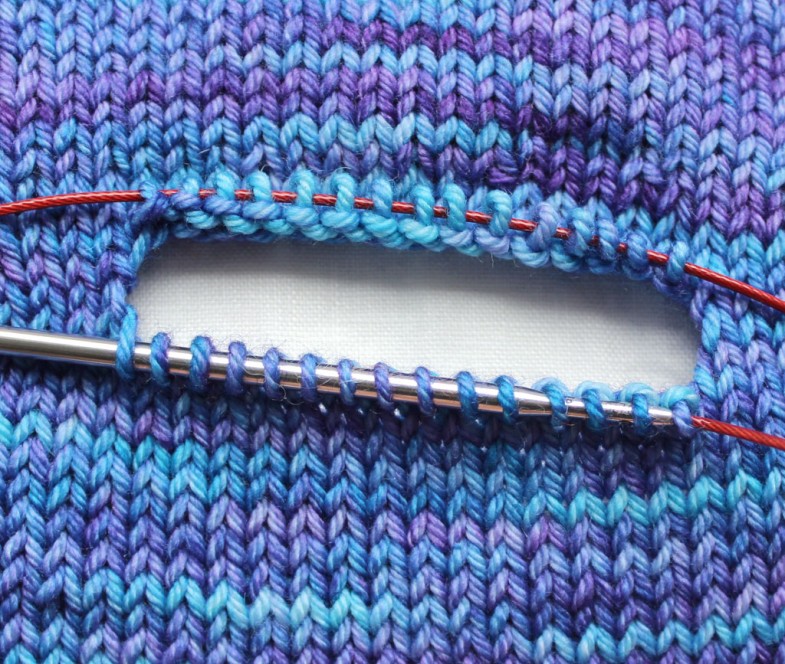
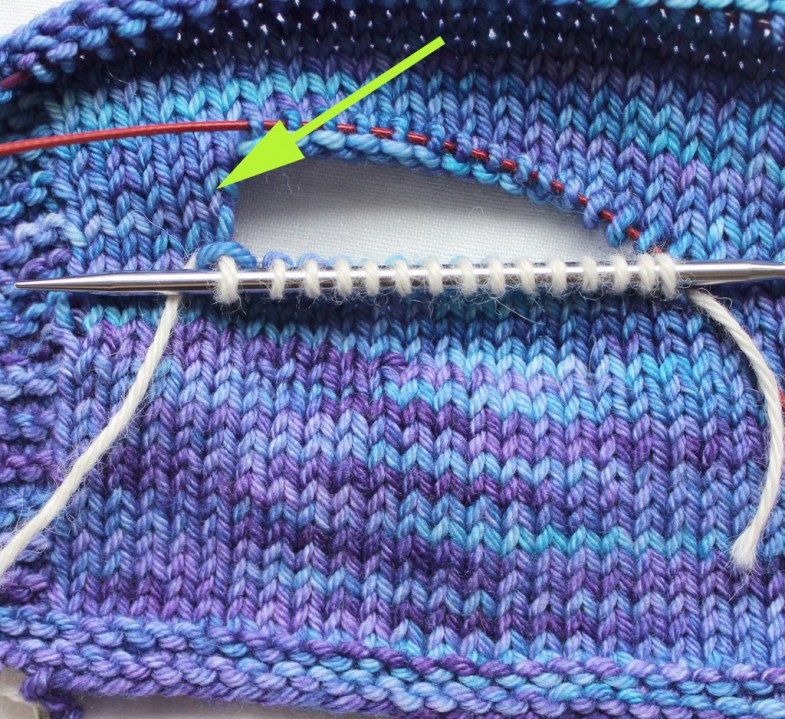
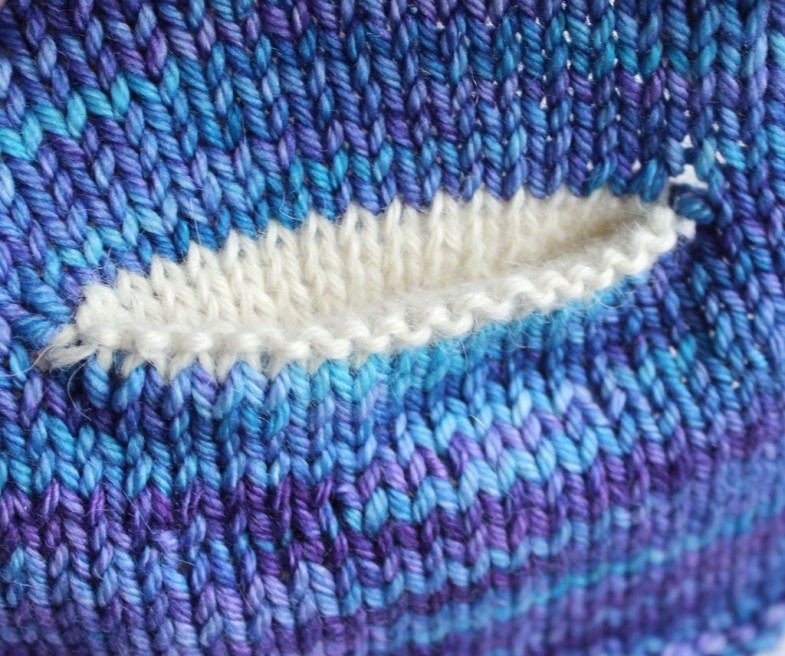
4b. You have a hole!
That’s good. That’s where your hand will go. Well, the pocket, too…
5. Join lining yarn – in same or contrasting colour.
Knit the 15/x stitches below the opening. Then pick up and knit one more (where the arrow points) in the gap.
(If magic looping, loop the cable now)
5b. Knit the 15/x stitches above – and again pick up and knit one more stitch in the gap.
= 32 stitches (2x + 2 stitches)
6. Next round: P16, loop cable, k15, p1 (loop cable).
You now have a purled folding ridge along the lower edge of the pocket opening.
The last stitch on each needle (the ‚gap stitch‘) is worked as a garter stitch (k1/p1 on alternate rounds) to create a better fold so the pocket lies flat on the inside.
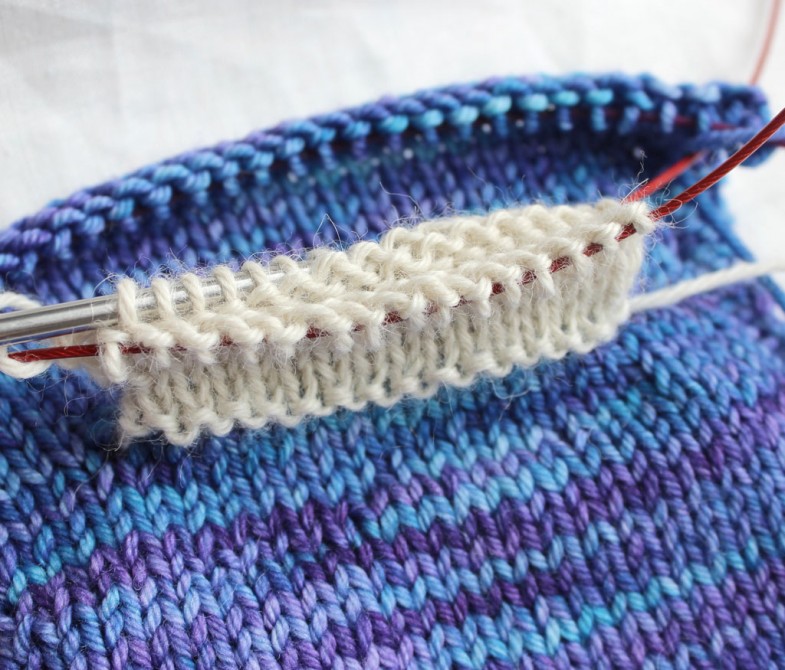
7. Knit in the round for as long as you want the pocket deep.
You’re basically knitting a protruding tube.
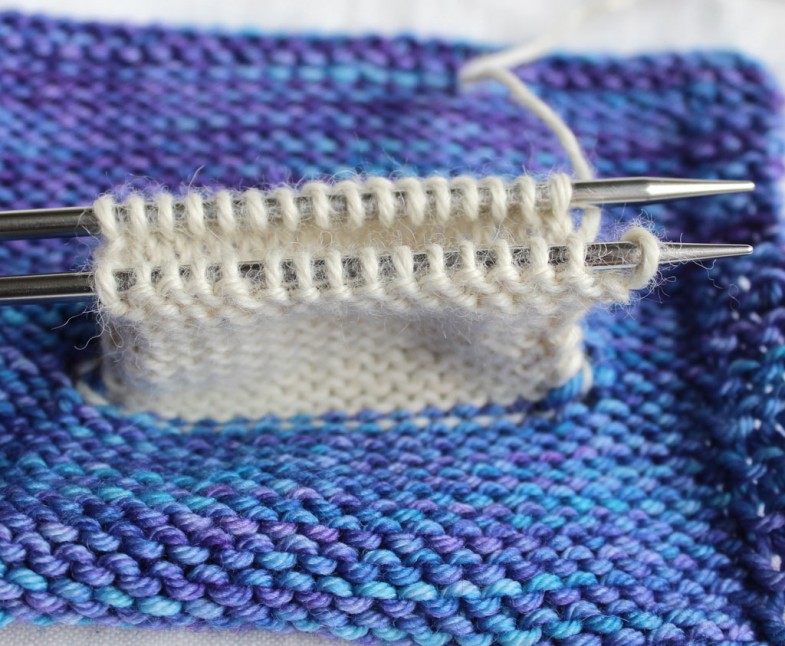
8. Push your pocket through the opening to the wrong side.
This is a very shallow pocket. But you get the idea.
9. Close the pocket with a 3-needle cast off (bind off).
Done!
This is the pocket you’ll find on my Filojokus sweater. It’s also the alternative and easier-to-knit pocket on my latest cardigan, Bambasala. This warm and wooly cardigan features double-knitted pockets which admittedly are a bit fiddly, but I couldn’t resist the challenge.
The simple inline pocket above will work just as well – and is also a bit sturdier for it has a double front wall.
Want to know what’s up my knitted sleeve? Sign up for the occasional Åsa Tricosa Newsletter.

18 Comments
Thank you, you’ve made this very clear! Love the pictures with the words. Thx!
I love your nondaily tips. Every single one a real treasure. Thank you!
Oh, thank you! Glad you think so. I’ll try to live up to it…
What a great idea, love to try it soon
Thanks for sharing…
This is marvellous. Thank you so much for the time and trouble you’ve taken to share this. The photos are so very helpful.
Splendid! And thank you!
Thanks sooo much for the great instructions. I love magic loop and top down sweaters but hate sewing pockets so will definately be trying this pocket with the pattern I am currently knitting at top speed for my 2 granddaughters
Lucky granddaughters!
Im so impressed Im not gona look any further. this is my first try at a pocket and I will always use this method. Thanx a million!!!
The simple act of choosing the Caesara tuck to knit has lead to so many newly acquired knitting skills! I’ve learned to do a tuck, a German short row, and this pocket technique. Many Thanks!
PS: I’m at the pocket stage now in my garment, which fits perfectly, BTW!
Oh, FUN! Thanks for posting! And have fun knitting the bitter end!
Thank you so much för sharing this! Great advice and easy to understand!❤🙏
This is brilliant . you explain it so well and make it simple. can’t wait to try it . Thank you for sharing.
Glad it inspired some pocketry at your end! /Åsa
I just finished one pocket, it looks great. Working on the second one. So happy, thank you for sharing!
Hooray!
I’m almost finished putting this pocket in my first Ziggurat, Mayhem DK. When I found this post, I thought your method and the sturdiness of the pocket so satisfying!
I appreciate your appreciation! It’s a tricky balance that, no? To get sturdy yet enough give to accommodate the stretch of the fabric… Glad it works!